


inception
Hello everyone, This article is part of the CircleCI series, The knowledge in this series is built in sequence.
In this series, we tried to cover how to use CircleCI features and capabilities. however, we shouldn't overlook the idea behind the CI/CD tools which is to deliver automation deployment, Therefor Today's Project will try to use what we learned and will discover more to Build a complete pipeline and deliver DevSecOps.
This pipeline covers How to Build, Test, and Scan Docker images, and code scanning.
Project Overview
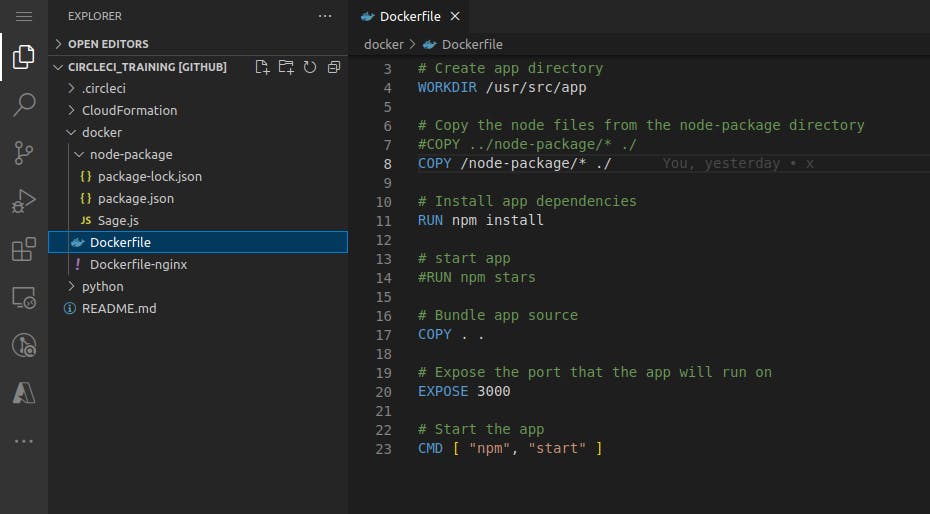
In This project will build a simple nodejs application and containerize it. don't worry it does not require any skills in nodejs to build this project up. Press to open up the GitHub repo at config-dockerScan.yml file.
This Project has four jobs: Build-image, Test, Scan, And Push-Image.
The Build-image job will cover how to build up our application to test and scan the functionality to make sure everything will doing well at the end on the production.
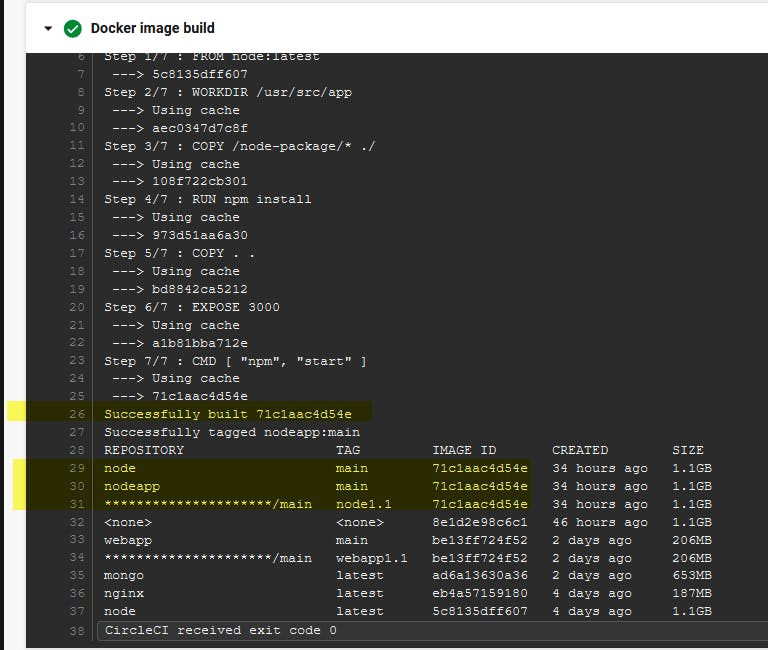
The Build-image covers the building of a container using a Dockerfile placed at the GitHub repo.
Dockerfile will use node Docker image, coping the node package files in the container, and install all the dependencies.
Then will run the built image using the
docker runcommand.
- The Test job will focus on Container testing.
After building our application in the container and running it, now it's time to test our container.
The Scan job will use Snyk Orb commands, to deliver DevSecOps features to our pipeline.
The Snyk tool definition as clarified by Snyk Docs is "Snyk is a platform allowing you to scan, prioritize, and fix security vulnerabilities in your code, open source dependencies, container images, and Infrastructure as Code (IaC) configurations."
The CircleCI Snyk Orbs provide the simplicity of using the Snyk command inside the CircleCI pipeline to scan and test your code.
The Scan job focuses on three areas, Project code scan, package.json file code scan, and docker image scan.
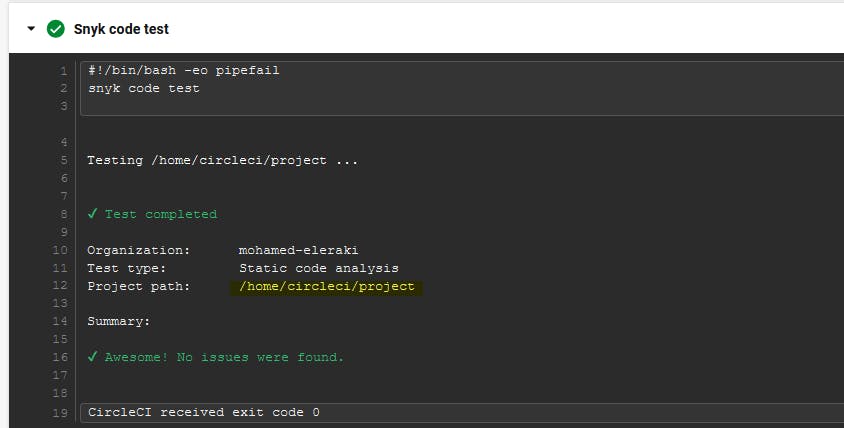
The Project code scan step will use The
snyk code testcommand tests for any known security issues using Static Code Analysis.The Package.json code scan step will use
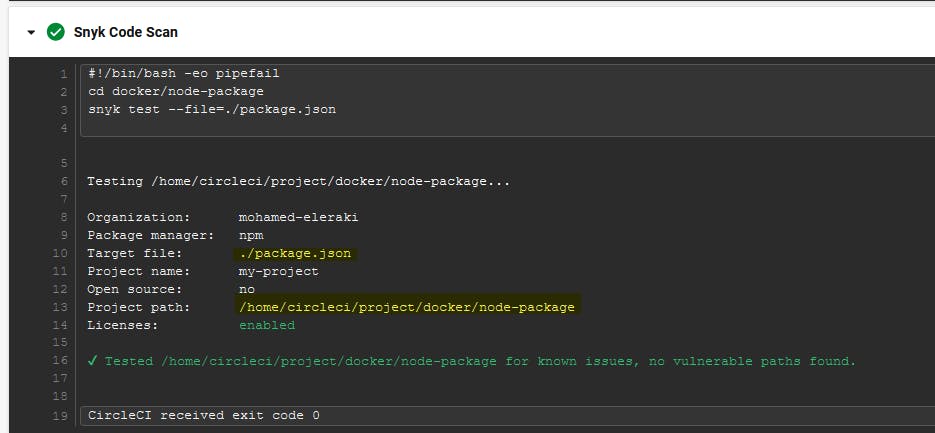
snyk test --file=./package.jsoncommand tests for any known security issues using Static Code Analysis, as well.The Docker image scan step will use the snyk orb command option
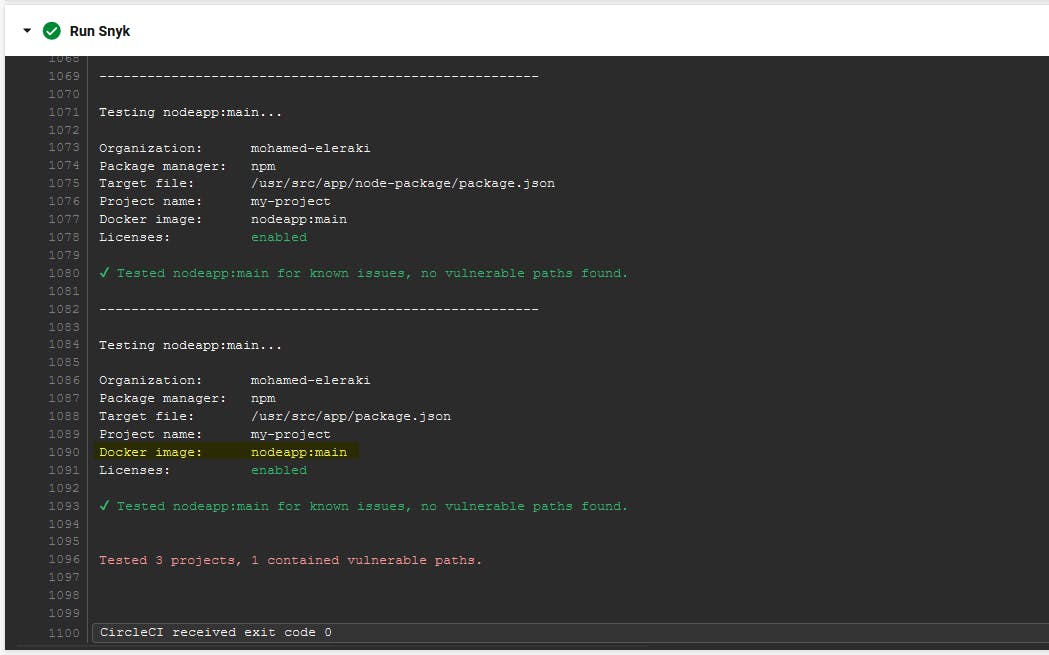
snyk/scanto scan the built image before deploying.
- The Last Job is Push-image to The Docker Hub, After building, testing, and scanning our code and image, Will Push the built image to The Docker Hub repo, To store it. So we can use it easily in the deployment by using
Docker pullcommand.
Snyk API step
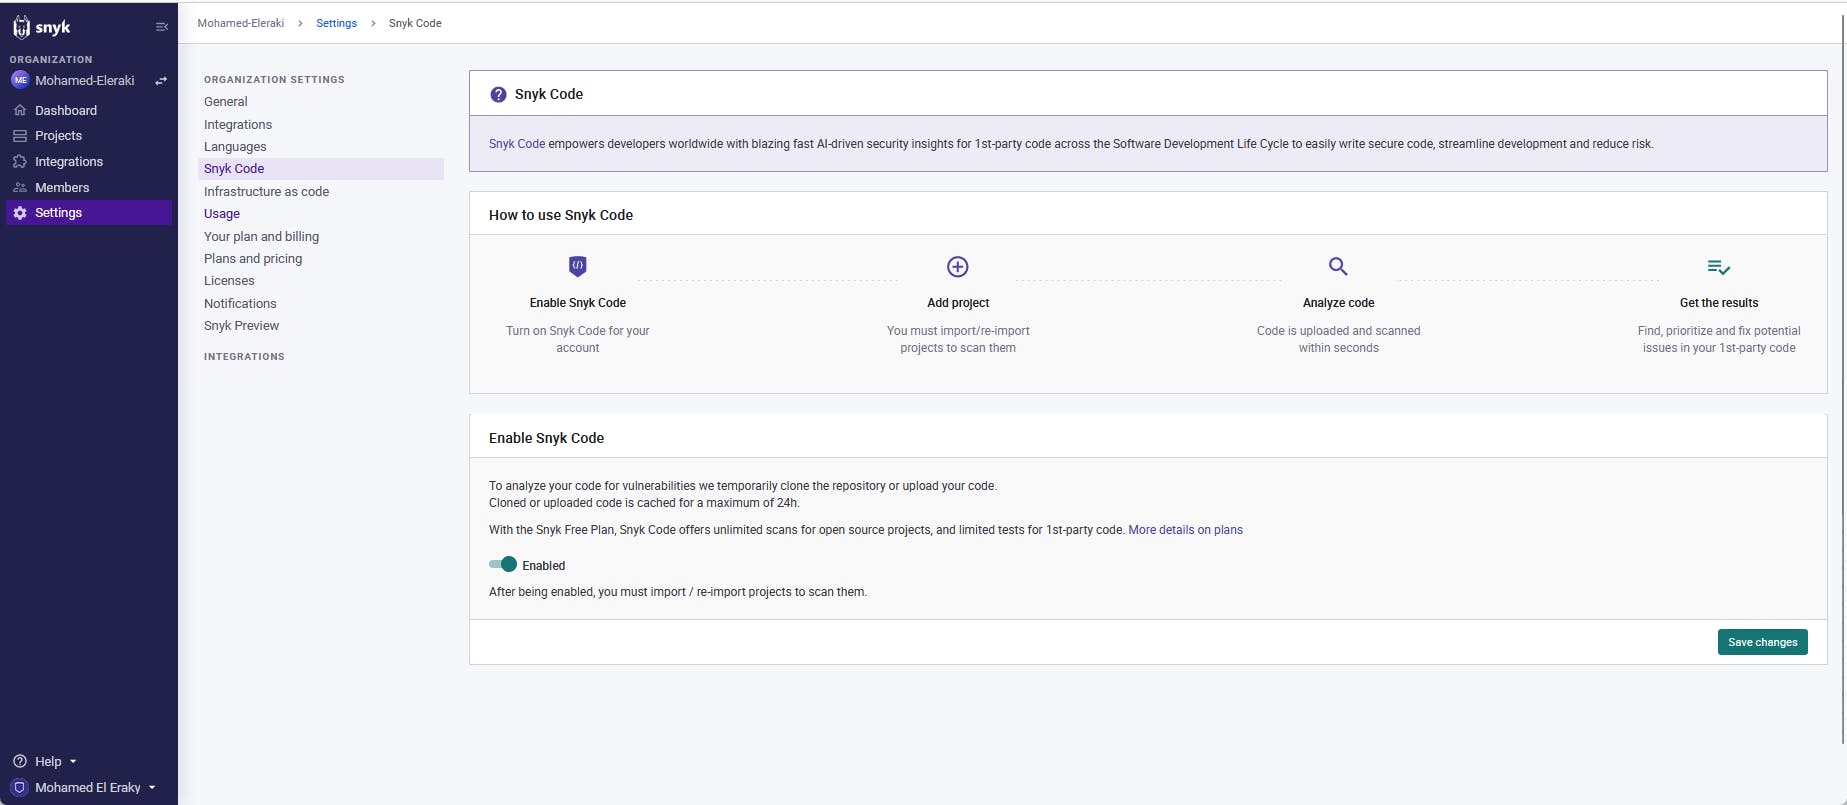
To integrate snyk.io with your pipeline you need to fetch an API token from snyk and use it in your pipeline So, you can upload your code to snyk.io to provide you test and scan.
Follow the steps at snyk docs to setup your snyk API token
Then enable snyk token to scan and test your code
Project YAML file config
After we get a high-level overview of the architecture of the pipeline, Now let's type The YAML file blueprint, The Pipeline will have four jobs:
Build-image
Test
Scan
Push-image

Let's build The YAML file code:
version: 2.1

# Define snyk orb for code scanning
orbs:
  snyk: snyk/snyk@1.7.0

# Defince executor machine as a parameter
executors:
   ubuntu_20-04-executor:
    machine:
      image: 'ubuntu-2204:2022.04.2'
      docker_layer_caching: true

jobs:

# Build docker image job
 build-image:

   # Fetch the executor defined above
   executor: ubuntu_20-04-executor


   steps:

     - checkout  # code checkout from repo

     - restore_cache:
         keys: [nodeAppBuild]

     # Login with credentials stored in the UI "context"
     - run:
          name: Docker login
          command: |
            echo "$DOCKER_PASSWORD" | docker login --username $DOCKER_LOGIN --password-stdin

     # build the application image
     - run:
          name: Docker image build
          command: |
            docker build -t nodeapp:$CIRCLE_BRANCH docker/.
            docker images

     # Run the image in a container
     - run:
          name: Docker run
          command: |
            docker run -p 3000:3000 nodeapp:$CIRCLE_BRANCH
            docker ps

     # save cache, to use the built image in the next jobs for testing and scaning
     - save_cache:
         paths: [docker/save_cache]
         key: nodeAppBuild

 Test:

   # Fetch the executor defined above
   executor: ubuntu_20-04-executor

   steps:

     - checkout

     - restore_cache:
         keys: [nodeAppBuild]


     - run:  # here type your own code for testing the application
         name: Contianer test
         command: |
           # write down your test code here
           docker images

     # save cache
     - save_cache:
         paths: [docker/save_cache]
         key: nodeAppBuild


 Scan:

   # Fetch the executor defined above
   executor: ubuntu_20-04-executor

   steps:
     - checkout

     - restore_cache:
         keys: [nodeAppBuild]

     # Install the snyk command using the snyk orb definced above
     - snyk/install

     # Project code scan
     - run:
         name: Snyk code test
         command: |
           snyk code test

     # package file code scan
     - run:
         name: Snyk Code Scan
         command: |
           cd docker/node-package
           snyk test --file=./package.json

     # image scan
     - snyk/scan:
         docker-image-name: nodeapp:$CIRCLE_BRANCH
         fail-on-issues: false  # we set it false just for test purpose

     # save cache
     - save_cache:
         paths: [docker/save_cache]
         key: nodeAppBuild


 Push-Image:

   # Fetch the executor defined above
   executor: ubuntu_20-04-executor

   steps:

     - checkout

     - restore_cache:
         keys: [nodeAppBuild]

     # Login with credentials stored in the UI "context"
     - run:
          name: Docker login
          command: |
            echo "$DOCKER_PASSWORD" | docker login --username $DOCKER_LOGIN --password-stdin

     # Push the image
     - run:
          name: Push the image to DOCKER HUB
          command: |
            docker images
            docker tag nodeapp:$CIRCLE_BRANCH mohamedibrahimeleraki/main:node1.1
            docker push mohamedibrahimeleraki/main:node1.1

     # save cache
     - save_cache:
         paths: [docker/save_cache]
         key: nodeAppBuild


workflows:
  Node-app:
    jobs:
      - build-image:
          context: Docker_Build_Context  # fetch the environment variables from the context
      - Test:
          requires: [build-image]
          context: Docker_Build_Context  # fetch the environment variables from the context
      - Scan:
          requires: [Test]
          context: Docker_Build_Context  # fetch the environment variables from the context
      - Push-Image:
          requires: [Scan]
          context: Docker_Build_Context  # fetch the environment variables from the context
Discover the code and the comments, Most of the usage techniques we have learned before.
Pipeline Result discovery
After configuring our pipeline and running it, now let's discover together the result, step by step.
Pipeline High-level Overview

Build-image job results discovery
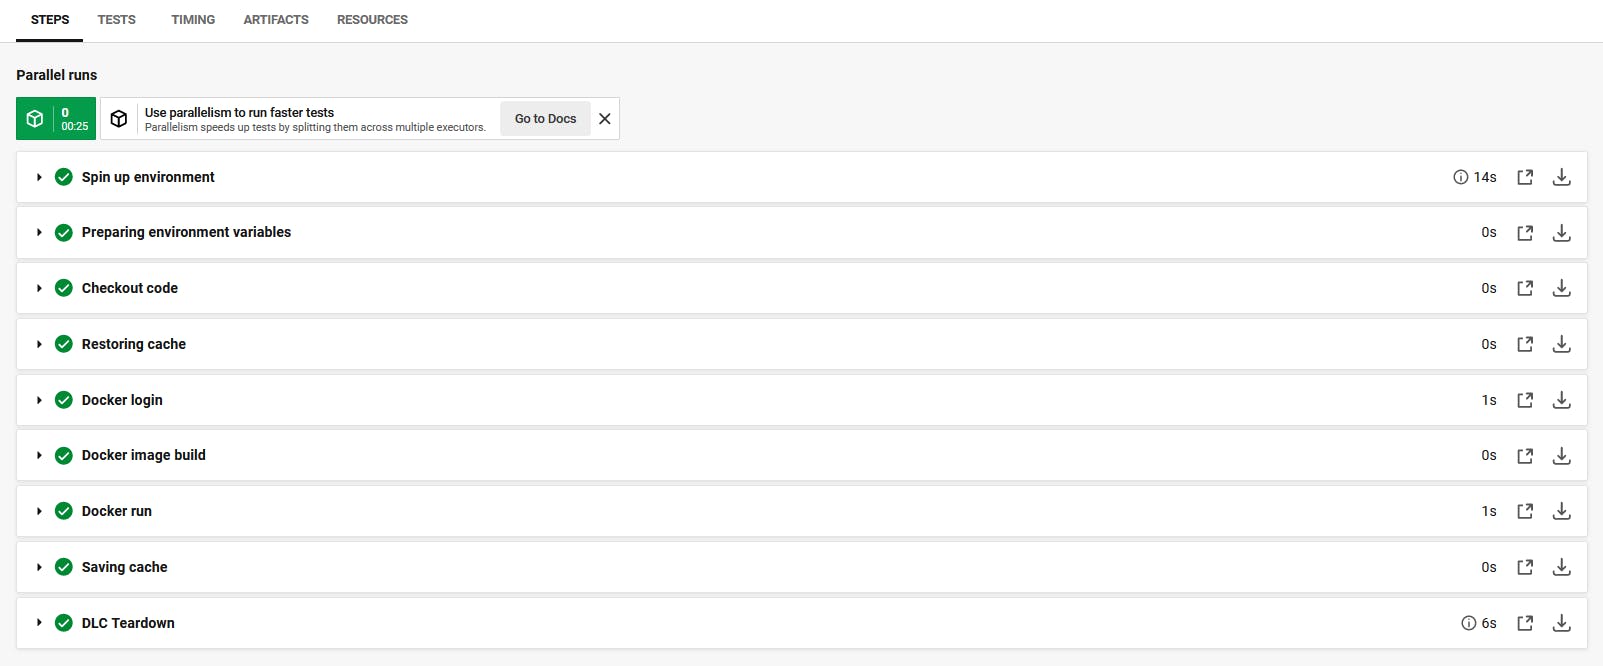

Press on Timing to discover the time consumed to finish this job
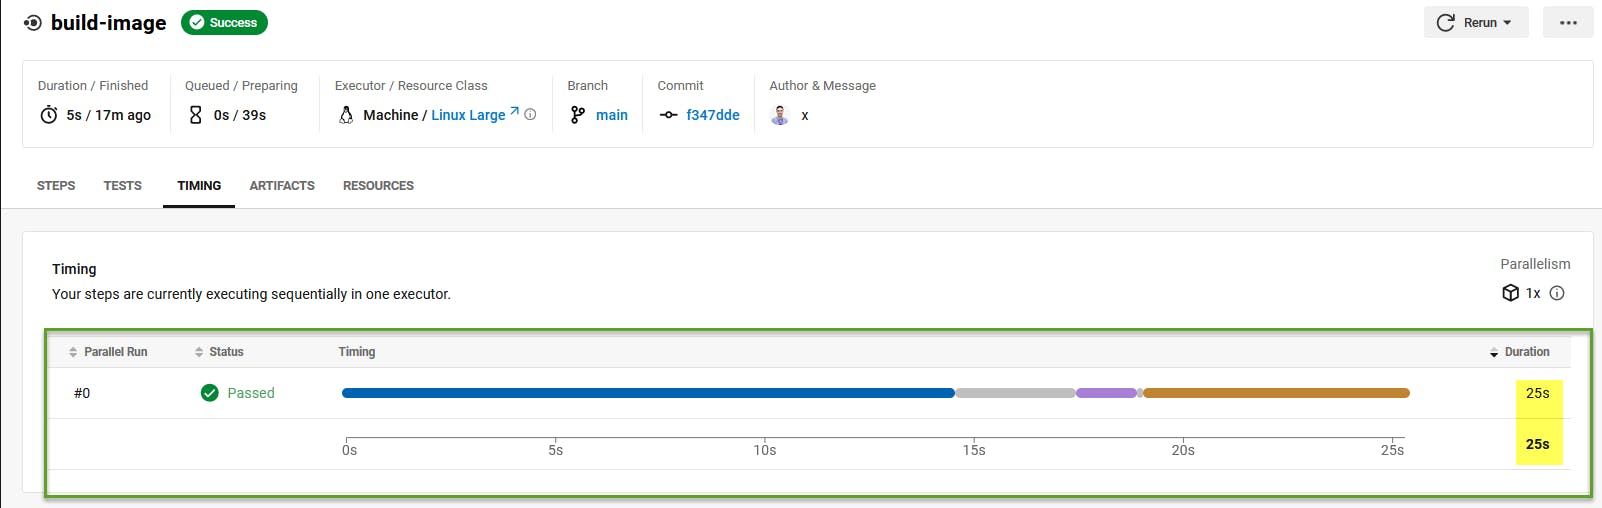
hover on each step to discover the time consumed for each step as well.
Test job results discovery
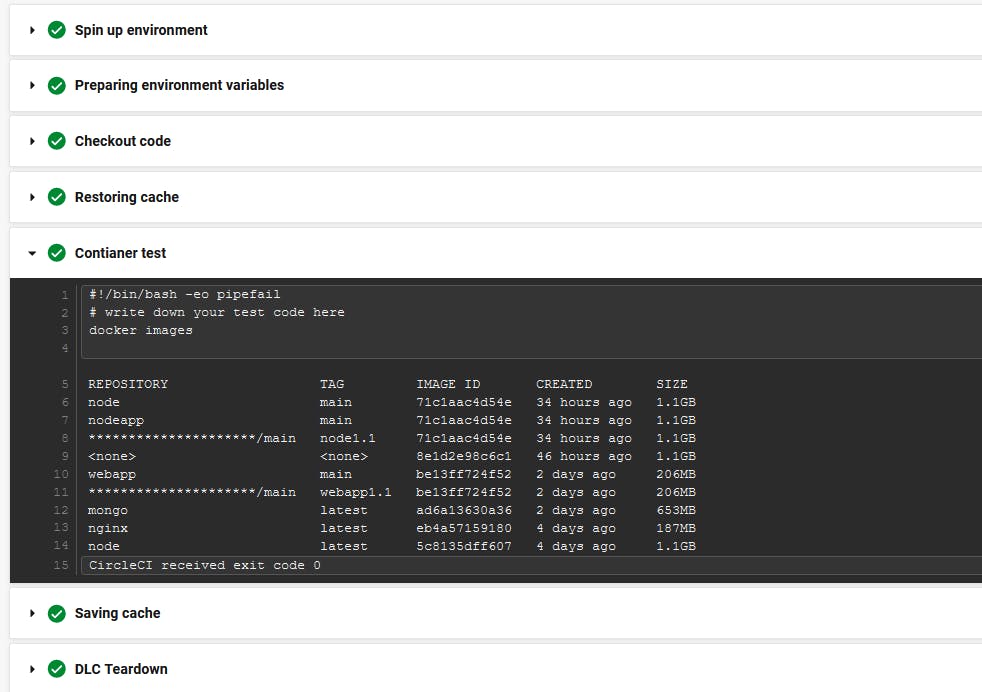
In the container test step, you should add some testing scenarios base on your application.
Scan job results discovery
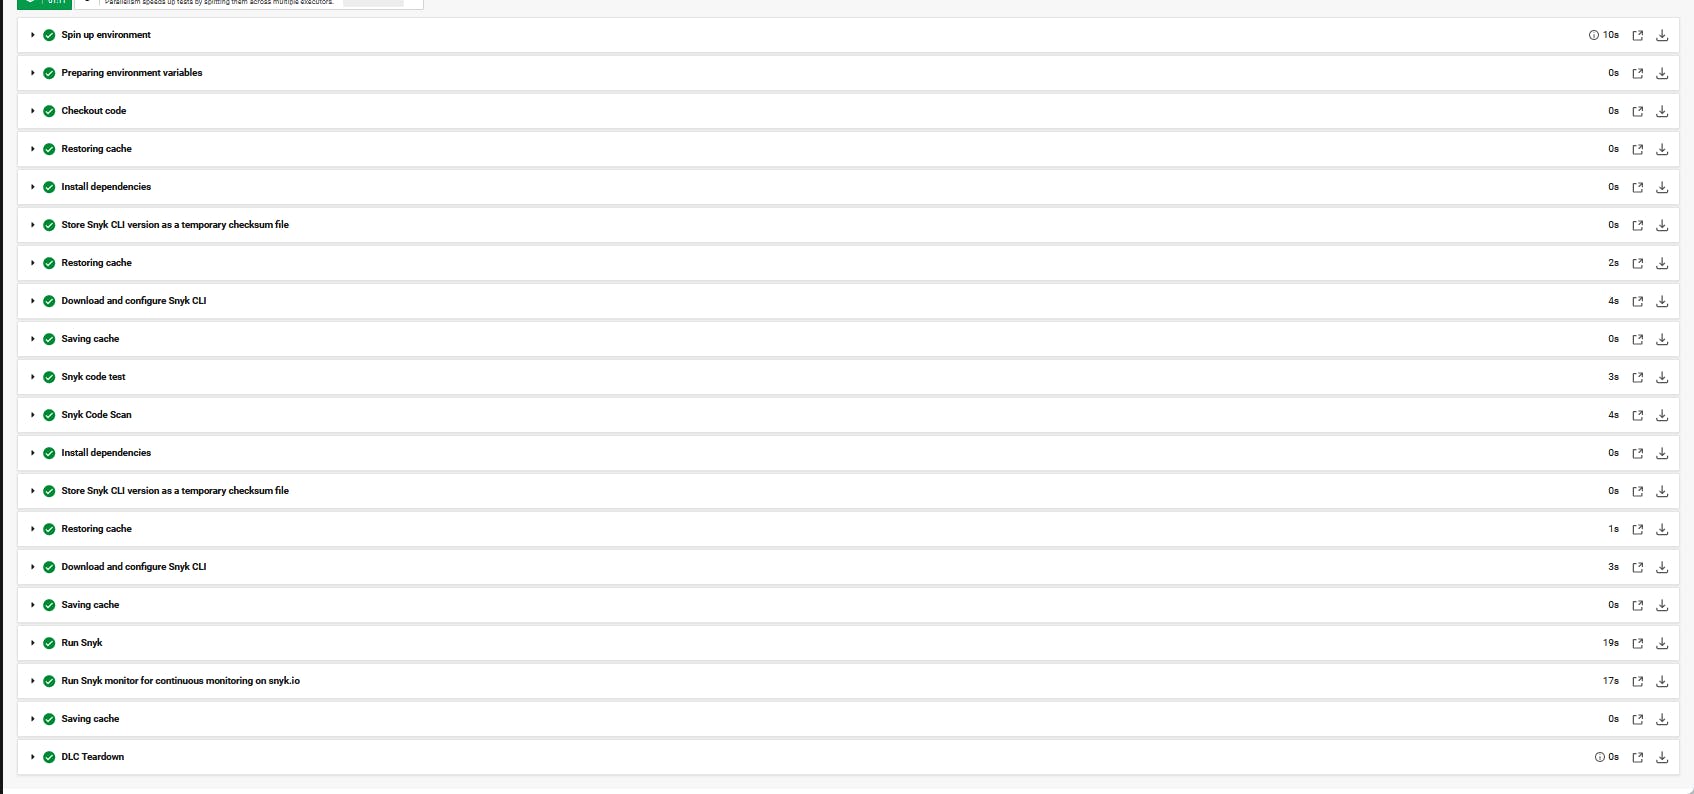
Most of these steps are defined by snyk orb to setup the environment code and caching.
At the Scan job, we have three focus areas [ Project code scan, Packagefile.json code scan, and Image scan ] as explained in the project overview section above.
Project code scan.
Packagefile.json code scan.
Docker Image scan.
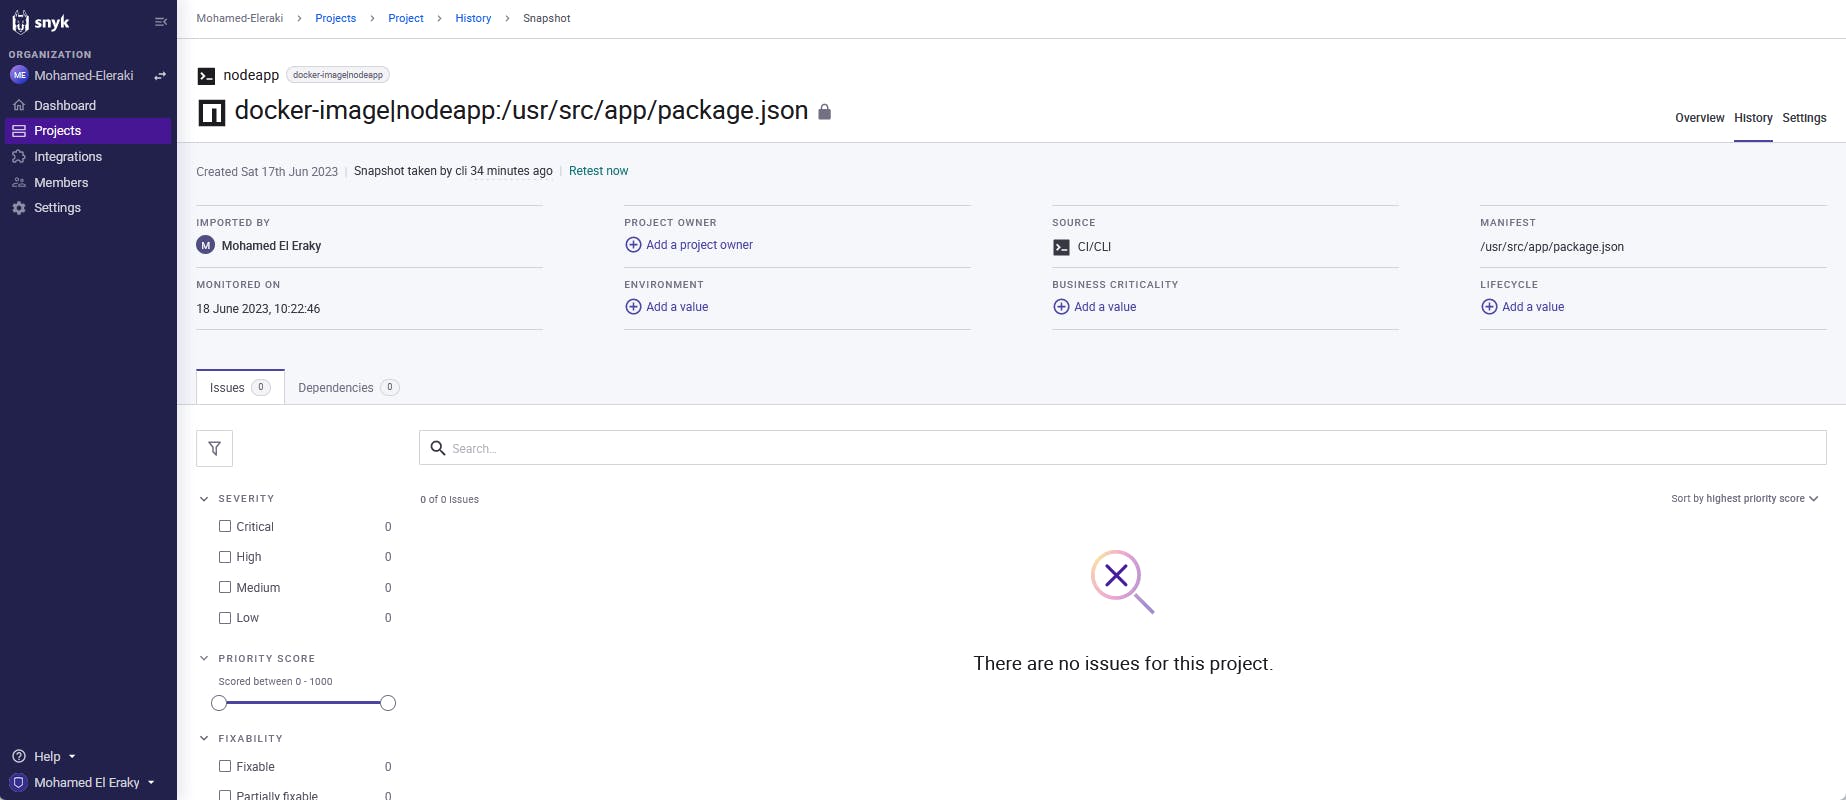
Snyk monitor for continuous monitoring on snyk.io.
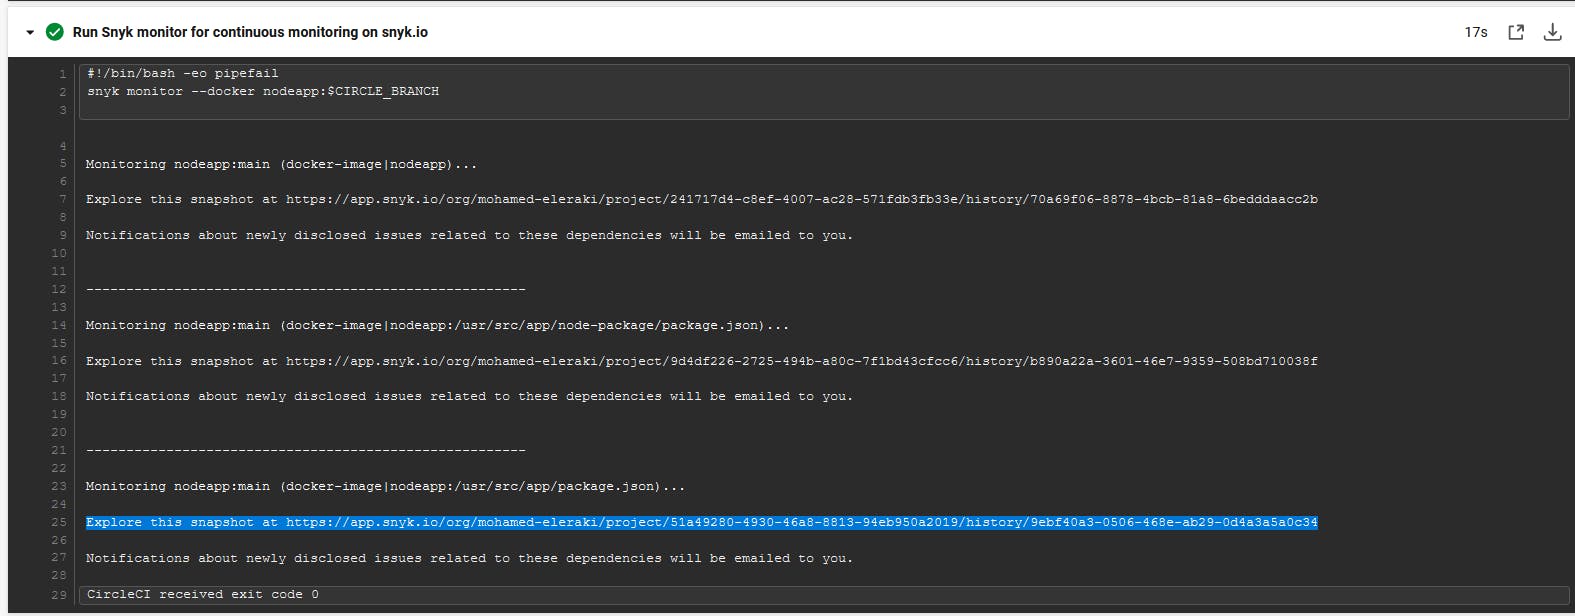
Snyk Monitor works by continuously scanning your project's dependencies and comparing them to the Snyk vulnerability database. If any new vulnerabilities are discovered, Snyk will alert you with information on the vulnerability, including its severity, affected versions, and remediation advice. You can then use this information to prioritize and fix the vulnerabilities in your project.
Press the highlighted link to discover your image scan on snyk.
DLC Teardown step.
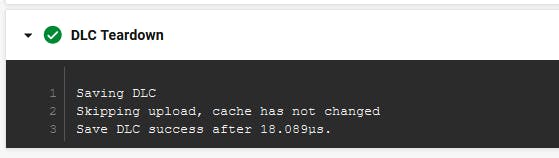
This step is defined Automatically, and it's for Docker layer caching.
to cache the docker build layers to help speed up the building in the future running.
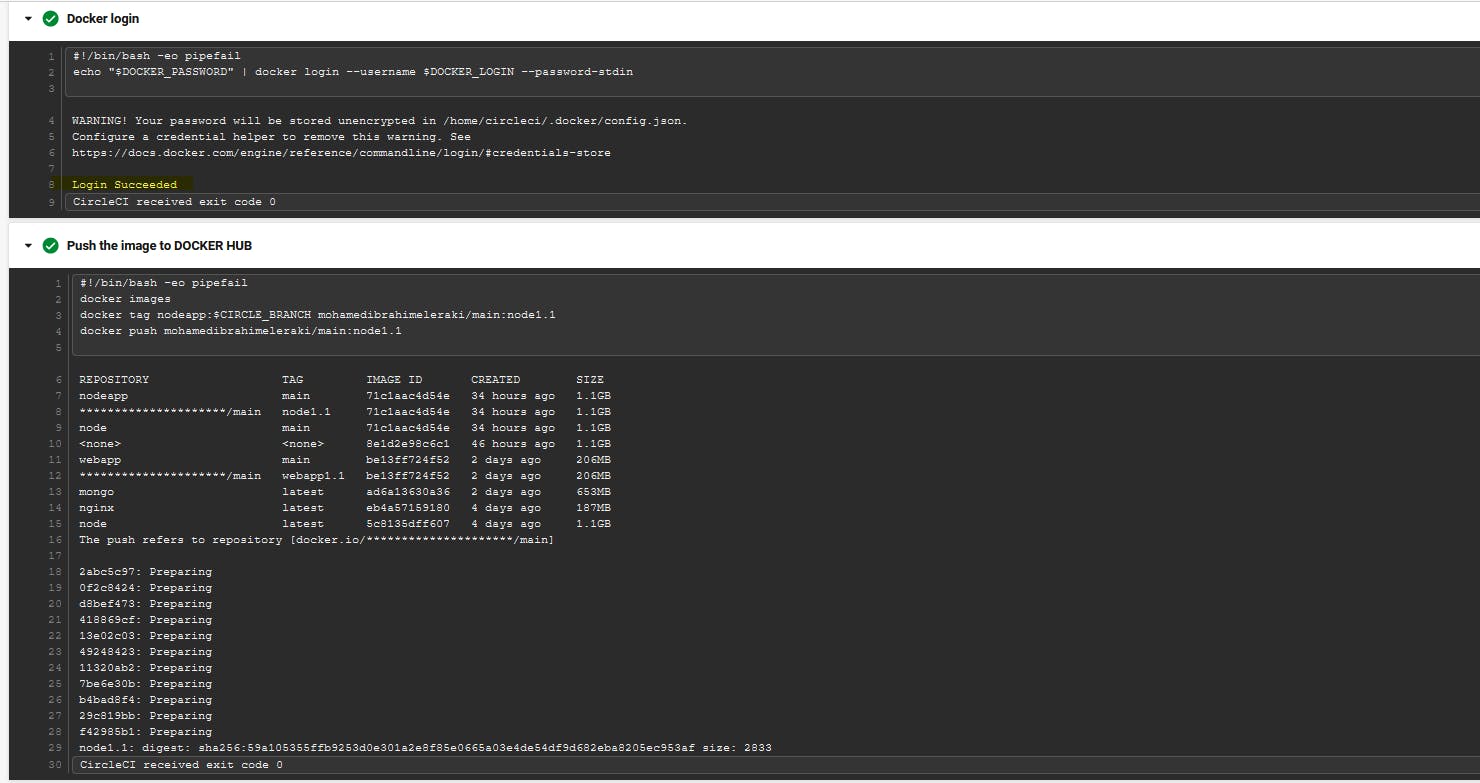
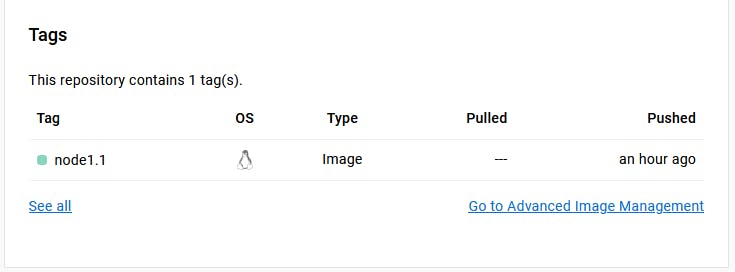
Push-image job result discovery.
After building, testing, and scanning our application we should store our image in a repository, So at this step will push the built image to our Docker Hub.
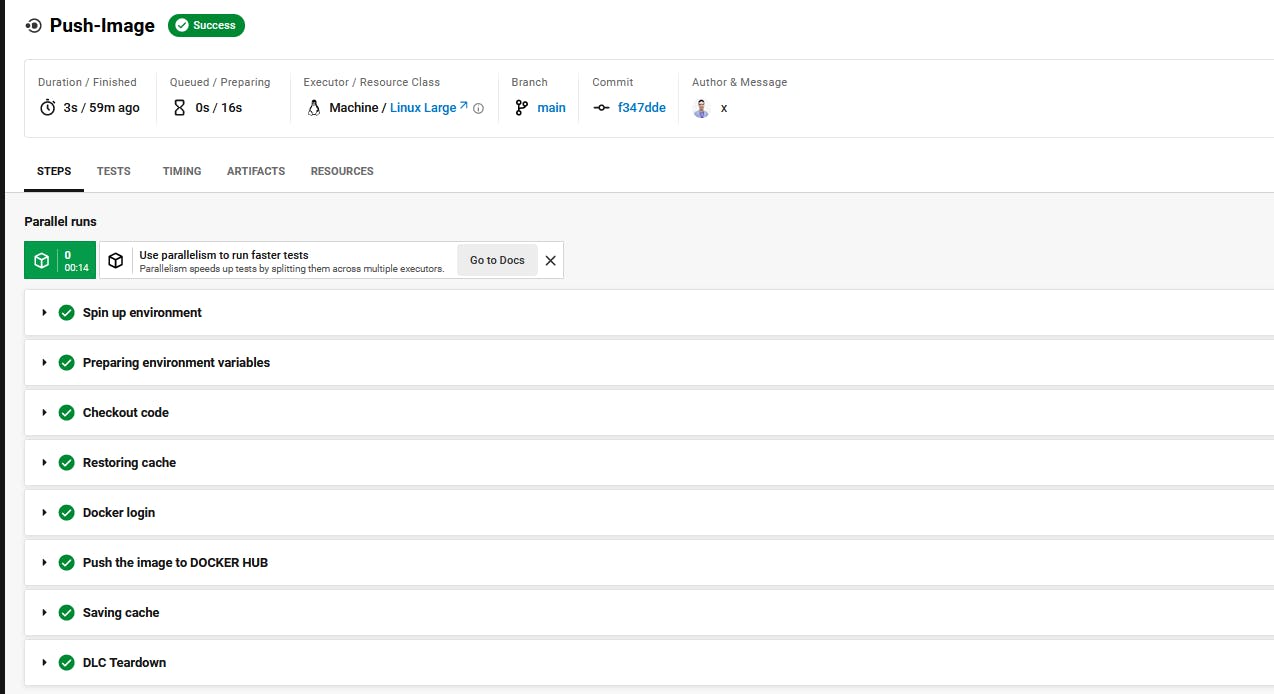
Now, let's discover the Doker Hub repo.
Summary
In this project, we tried to build an entire project with scanning code vulnerabilities to deliver the DevSecOps to our pipeline, The jobs in the pipline are:
Build-Image
- Build a node docker image, copy node-package inside it, and install the dependencies.
Test
- Testing the the application functionality.
Scan
- At this job will scan the node package code, the entire project code, and The docker image using synk.
Push-image
- After all will push the built image to docker hub.
That's it, Hope this article inspired you and will appreciate your feedback. Thank you.